Context
I wrote a similar blogpost to this one, around 6 years ago, about uploading files to Digital Ocean Spaces using API Keys and Boto3 on Medium. I figured that now is a good time to update the guide having seen the drastic UI changes on Digital Ocean’s platform from the last time I wrote the other piece. I also had a block of content from my other piece around building a RAG Pipeline on Digital Ocean that I could directly use here, so that made this process quite easy.
Understanding Digital Ocean Spaces
Spaces is Digital Ocean’s S3 Alternative and it’s Spaces API has always been S3 compatible. This simply means that Digital Ocean Spaces’ API and Amazon’s AWS S3 API are interoperable.
Since I’ve always loved using boto3 (AWS SDK for Python), the main aim here is to update the Medium article I wrote all those years ago, to keep it fresh.
Creating a Spaces Bucket
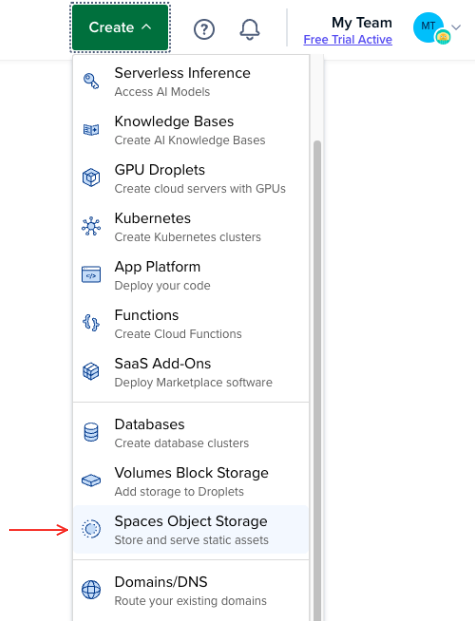
So the first step, is to actually create a Spaces Bucket. On the main menu, we simply click on Create > Then Spaces Object Storage.
Choosing Region of the Bucket
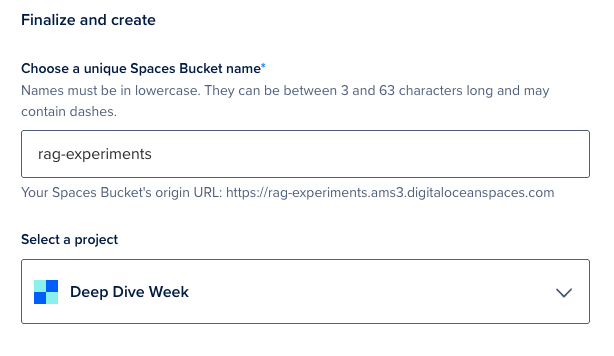
We start off by selecting the region of the Spaces Bucket, we choose Amsterdam, but this really can be any available location.

Enabling CDN
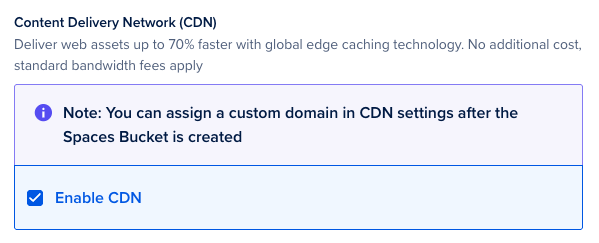
I enabled the CDN feature because I would potentially need this functionality for future experiments. However, for what I was originally creating this Bucket for, this was not a must have. (Also from what I remember, this particular feature was not available when I wrote my article from 6 years ago).
Naming our Spaces Bucket
Next we name our Spaces Bucket - rag-experiments.
Understanding Cost implications of using Spaces on Digital Ocean
The total Monthly cost is about $5/month for this. This base rate of a Spaces subscription gives us the ability to create multiple Spaces buckets. It also includes 250 GiB of data storage (cumulative across all of our buckets). Additional storage beyond this allotment is $0.02 per GiB per month. I think quite cheap considering how seamless it works and how easy it is to integrate across (I’ve done nothing but abuse this service over the years for various projects - both production and basic prototypes).
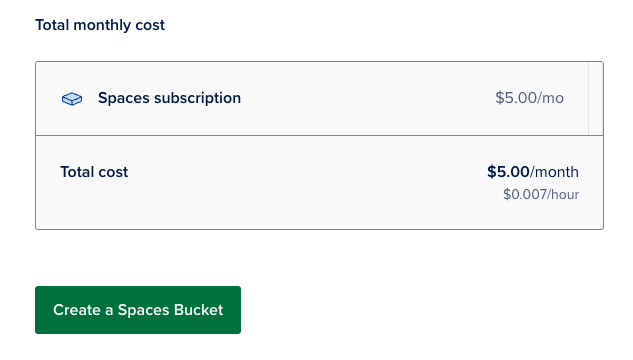
This should genuinely be more than enough for this since we won’t be using this for production use-cases, just experiments. We go ahead and create the Spaces Bucket.
Bucket created
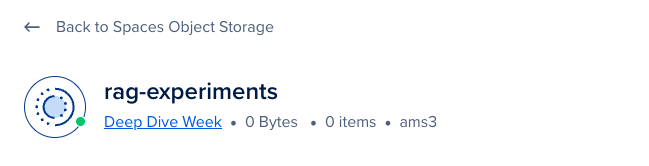
We now are in a position where we can upload the data sources into our Bucket. Let’s do that at this point. For me, my workflow will be super simple, I will create a folder locally that has all the information I need then upload it using boto3.
Uploading data to the Spaces Bucket
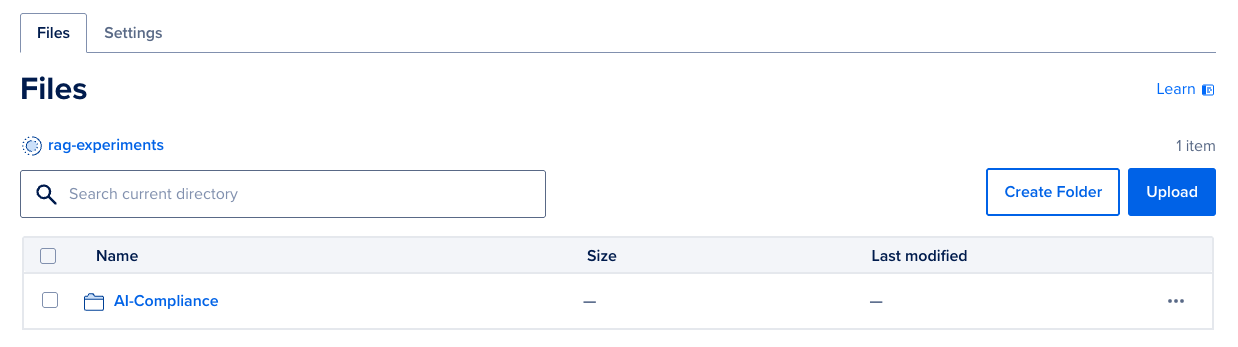
Earmark the folder we want to upload
The folder I wanted to upload is called AI-Compliance on the directory /Users/brian/documents/Books in my Mac.
Generate Access Keys for the Bucket
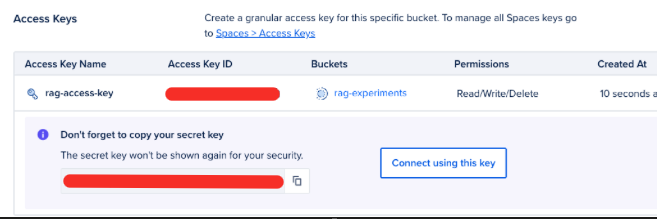
I go ahead and generate access keys for the bucket rag-experiments by simply clicking on the settings option then finding the Access Keys option then we Create Access Key. (This process changed quite a bit from my last article, years ago - but only from a UI perspective. The underyling process is generally similar.)

We will go with Limited access. Limited access lets us set more specific Read or Read/Write/Delete permissions for each bucket we create in our space. Full access allows all supported S3 API commands on all buckets - which is not good practice from a security principle. Even though we’ll be working locally, Limited access will ensure we have all the permissions needed for strictly uploading data to the Buckets (which is the scope).

Once you have clicked on create, we get our secret key and Access Key ID. (You can only view the secret key once btw)
Creating our Upload script
Now that we have our Access Key ID and the Secret Key, we can actually create our Upload script.
cd /Users/brian/Documents/Bookstouch upload_script.pypip3 install boto3python3 upload_script.py
Our upload_script.py looks like this and it basically uploads folders to the base directory of the Bucket. All you have to do is fill in the Access ID and Secret Key, and install boto3 and it just works! Super convenient.
import boto3from boto3 import sessionfrom botocore.client import Configfrom boto3.s3.transfer import S3Transferimport os
#Use the API Keys you generated at Digital OceanACCESS_ID = 'xxxxxxxxxxxxxxxx'SECRET_KEY = 'xxxxxxxxxxxxxxxx'
# Initiate sessionsession = session.Session()client = session.client('s3', region_name='ams3', #enter your own region_name endpoint_url='https://ams3.digitaloceanspaces.com', #enter your own endpoint url aws_access_key_id=ACCESS_ID, aws_secret_access_key=SECRET_KEY)
transfer = S3Transfer(client)
# Upload entire folderfolder_path = '/Users/brian/Documents/Books/AI-Compliance'for root, dirs, files in os.walk(folder_path): for file in files: file_path = os.path.join(root, file) # Keep folder structure relative_path = os.path.relpath(file_path, '/Users/brian/Documents/Books') print(f"Uploading {file_path} as {relative_path}") transfer.upload_file(file_path,'rag-experiments', relative_path) # Make it public if needed #response = client.put_object_acl(ACL='public-read', Bucket='name-of-space', Key=relative_path)(You can find the gist of the code here )
The upload process may take a while, but it should work seamlessly.
If you want a gist of code that uploads files only, you can use this gist I made years ago, it still works pretty great.
import boto3from boto3 import sessionfrom botocore.client import Configfrom boto3.s3.transfer import S3Transfer
#Use the API Keys you generated at Digital OceanACCESS_ID = 'xxxxxxxxxxxxxxxxxxx'SECRET_KEY = 'xxxxxxxxxxxxxxxxxxx'
# Initiate sessionsession = session.Session()client = session.client('s3', region_name='sgp1', #enter your own region_name endpoint_url='https://sgp1.digitaloceanspaces.com', #enter your own endpoint url
aws_access_key_id=ACCESS_ID, aws_secret_access_key=SECRET_KEY)
transfer = S3Transfer(client)
# Uploads a file called 'name-of-file' to your Space called 'name-of-space'# Creates a new-folder and the file's final name is defined as 'name-of-file'transfer.upload_file('name-of-file', 'name-of-space', 'new-folder'+"/"+'new-name-of-file')
#This makes the file you are have specifically uploaded public by default.response = client.put_object_acl(ACL='public-read', Bucket='name-of-space', Key="%s/%s" % ('new-folder', 'new-name-of-file'))To understand how this gist for uploading files works, read the last section of this other blog I wrote years ago.
Conclusion
That’s that, the process is actually quite seamless and the gists should be valuable if you ever need to use this approach. Feel free to remix, fork and tweak them as needed for your use cases. In case you want more documentation about other boto3 capabilities, this should be a great guide for sure.